
You don’t want to be the frustrated wedding photographer I mentioned in the first part of this post. You want to be undaunted in the face of dozens or hundreds of photos from a shoot. And you want to know you’ve picked the best photos from your take during your edit. Let’s walk through the steps of your edit.
If you’ve followed the steps in the previous post, you should have a folder, named with the year, date and slug, of your photo shoot/assignment/job. That folder should be loaded with your images, which have been renamed the same as the folder, and numbered sequentially starting at 200. Metadata has been added to these images.
Open that folder with your browsing/digital asset management software. Keep your photos sorted by time, and make sure you’re looking at thumbnails, rather than one photo at a time.

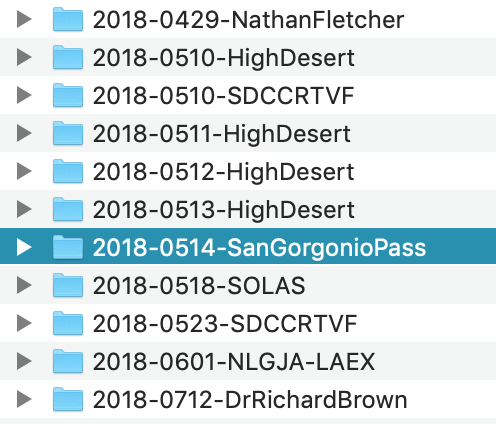
Your folder of images, renamed starting at 200 and shown in Photo Mechanic, should look like this.
Your browsing software (Photo Mechanic, Adobe Bridge, XNView MP, etc.) has ways of marking individual photos, and then later grouping them based on those marks. You may use a number or a letter on your keyboard to add little stars, a color, checkmarks, etc. You will need at least three different marks to rate your photos, and a simple checkmark approach only gives you two - is it checked or unchecked? So find what your software offers that allows you to mark different ratings on your photos. If it’s keyboard-based, rather than a mouse click, that’s faster.
Go through your images as thumbnails, and mark the ones that jump out at you with one rating, for example the number 1. This should be a fairly quick edit. If you leaned on the motor and you have a small group of similar images, just mark them all with the number 1. You’ll take a closer look later.
Just pick the ones that really work, even as thumbnails. If they look good as small photos, that’s a good sign.
As you’re going through, you might see some stinkers. The ones that are really out of focus, embarrassingly awful accidental exposures, etc. Hey, it happens to all of us. Mark those with your number 3. So as you’re going through your take, you’re marking the best and the worst of what you see.
After you’re done, have your software select the #3 photos, so you ONLY see those really bad ones. There probably won’t be too many. Make sure you didn’t include anything good in that batch by accident, then select them all and trash them. You’re not going to use them, ever, so throw them out. All they’re doing is taking up disc space and making you feel like a bad photographer.
Now go back and select your #1 photos. Start looking at them not as thumbnails any more, but so they fill your monitor, one at a time. This way you’re checking for critical sharpness. And if you had a sequence of similar photos, you’ll want to compare them against each other so you determine your favorite from that sequence. Keep all the best images selected as #1, and deselect all of the images that are not as good. Often this is done by clicking the zero on your keyboard, but there are different ways to do this.
What you’re looking for is “I knocked it out of the park.” Those are your best, your #1 photos. Hitting singles and doubles is okay if we learn from them, but they’re not what we’re aiming for.
When eliminating your second-best, pay close attention to moments, story-telling details, subtleties of light. Is there something distracting in the foreground or background? If so, can it be cropped out? If two photos are real similar, what separates them? Something is always going to make one photo weaker than another.
When you’ve gone through the entire batch of #1-rated images and you’ve settled on your selection of the very best among them, that’s your first edit. Look at those photos. Hopefully they tell the story you’re trying to tell.
Now ask yourself if there’s something missing. Did you not pick a photo from the married couple’s first dance? From the cake-cutting? If so, now is your chance to go back and find it. It may not be as strong as the photos you already selected, but if it helps tell the story, you’ll want to add it to your edit.
Don’t be self-indulgent, however. Your second edit isn’t an excuse to start adding mediocre photos that you know aren’t very strong. All you’re doing here is filling in any gaps, making sure your story is complete.
Don’t be emotionally attached to bad photos. Just because you brought your shiny new drone to an assignment, that doesn’t mean you need to include a drone photo in your edit.
So be honestly critical and brutal about your work. Be as a judge in a contest, as if you were looking at someone else’s photography. It doesn’t matter how hard you worked to get a certain photo if the resulting photo isn’t good enough. You have to be willing to leave out anything that doesn’t meet your standards.
After this process, you should be narrowed down to your best images. You can go back over your take again, to see if you missed anything that you need to help tell the story. And you may want to go back, the first few times you try this method, until you become more confident in your editing.
Once you’re done, select your edited best images and batch rename just those images, this time starting your sequence at 001. You keep the YEAR-DATE-SLUG, and just change the number that follows them.
Now when you open your folder, your best photos will show up at the top, named YEAR-DATE-SLUG_001, YEAR-DATE-SLUG_002, etc.

Now your edited take should look like this, with your favorites renamed as 001, 002, etc.
At this stage, and before I start my post processing, I’ll usually back up this batch of edited, renamed and metadata-infused images to an external hard drive or two. That way if something really bad happens, I won’t have to start over. Once I’ve completed my post processing and exported my finished images, I’ll back up my entire edit, my worked photos and my exports, and I’ll delete this folder from the middle stage of my process.
Where does that leave us?
Now we have one folder for all of our photos. Inside, individual shoots are arranged by date and slug, so we can easily lay our hands on the photos we’re looking for.
Each photo has metadata embedded, which makes it easy to find photos by simply doing a keyword search.
The very best images from each shoot have been picked, and they’re numbered so you see them first when you open up a folder and arrange by file name.
Images have been worked and exported as needed, and the originals and at least one duplicate set has been backed up.

After you go through this process, it gets easier. And you start populating a folder arranged so you can find your work when you want it. That’s your archive.
If you’re like that wedding photographer from the previous post, I hope this helps you to tackle your edits without being intimidated by the idea of having a thousand images to go through. Just break down the process into the steps I described, and you should be on your way to being in control of your photos, and not the other way around.
